

There's a feature in Google's Photos app for Android, iOS, and the web that lets you create shared albums with your friends and family. It's really a useful feature that makes it fun and easy to collaborate on an album with a person or persons of your choosing.
It allows for some wonderful things, like going to a concert with a group of friends, taking a bunch of pictures, and dumping them into a single album. Or, say you're vacationing with your significant other and you really want to capture the experience so you can share it later with your mother, you know, that person who is always saying you never take enough pictures—well, now you can.
- Don't Miss: How to Transfer ALL Your Pics to Google Photos
It's a great feature to have, but a little tricky if you've never used it before, or are new to Google Photos. But don't worry, we'll show you how it's done.
Step 1: Install Google Photos
If you're planning on using Google Photos on Android or iOS, head over the to the Google Play store or iOS App Store and download the Google Photos application.
Additionally, Google Photos can be used from within a desktop browser as well and we'll show you how to create a Shared Album on both your mobile device and on your desktop browser.
Step 2: Create a Shared Album
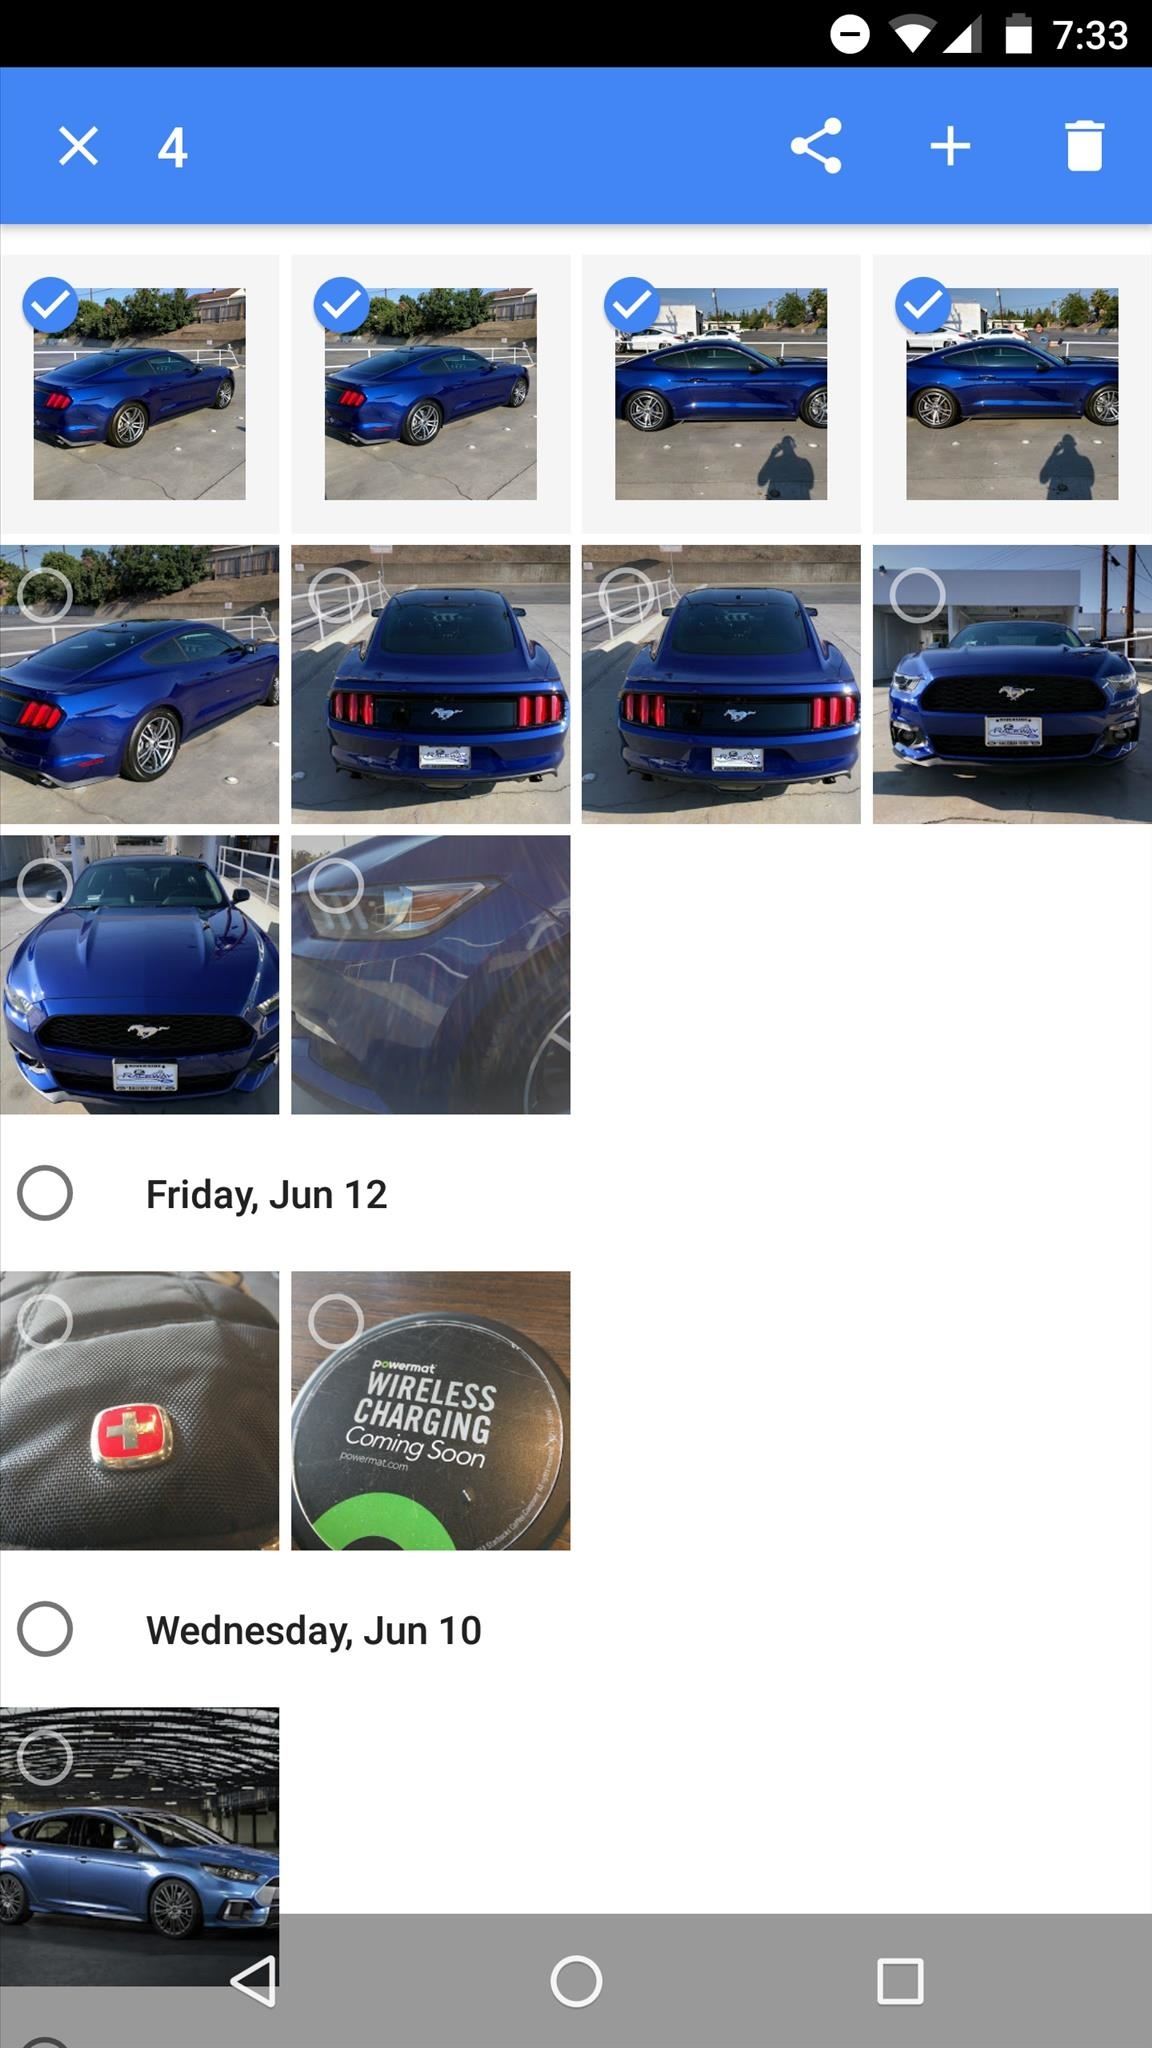
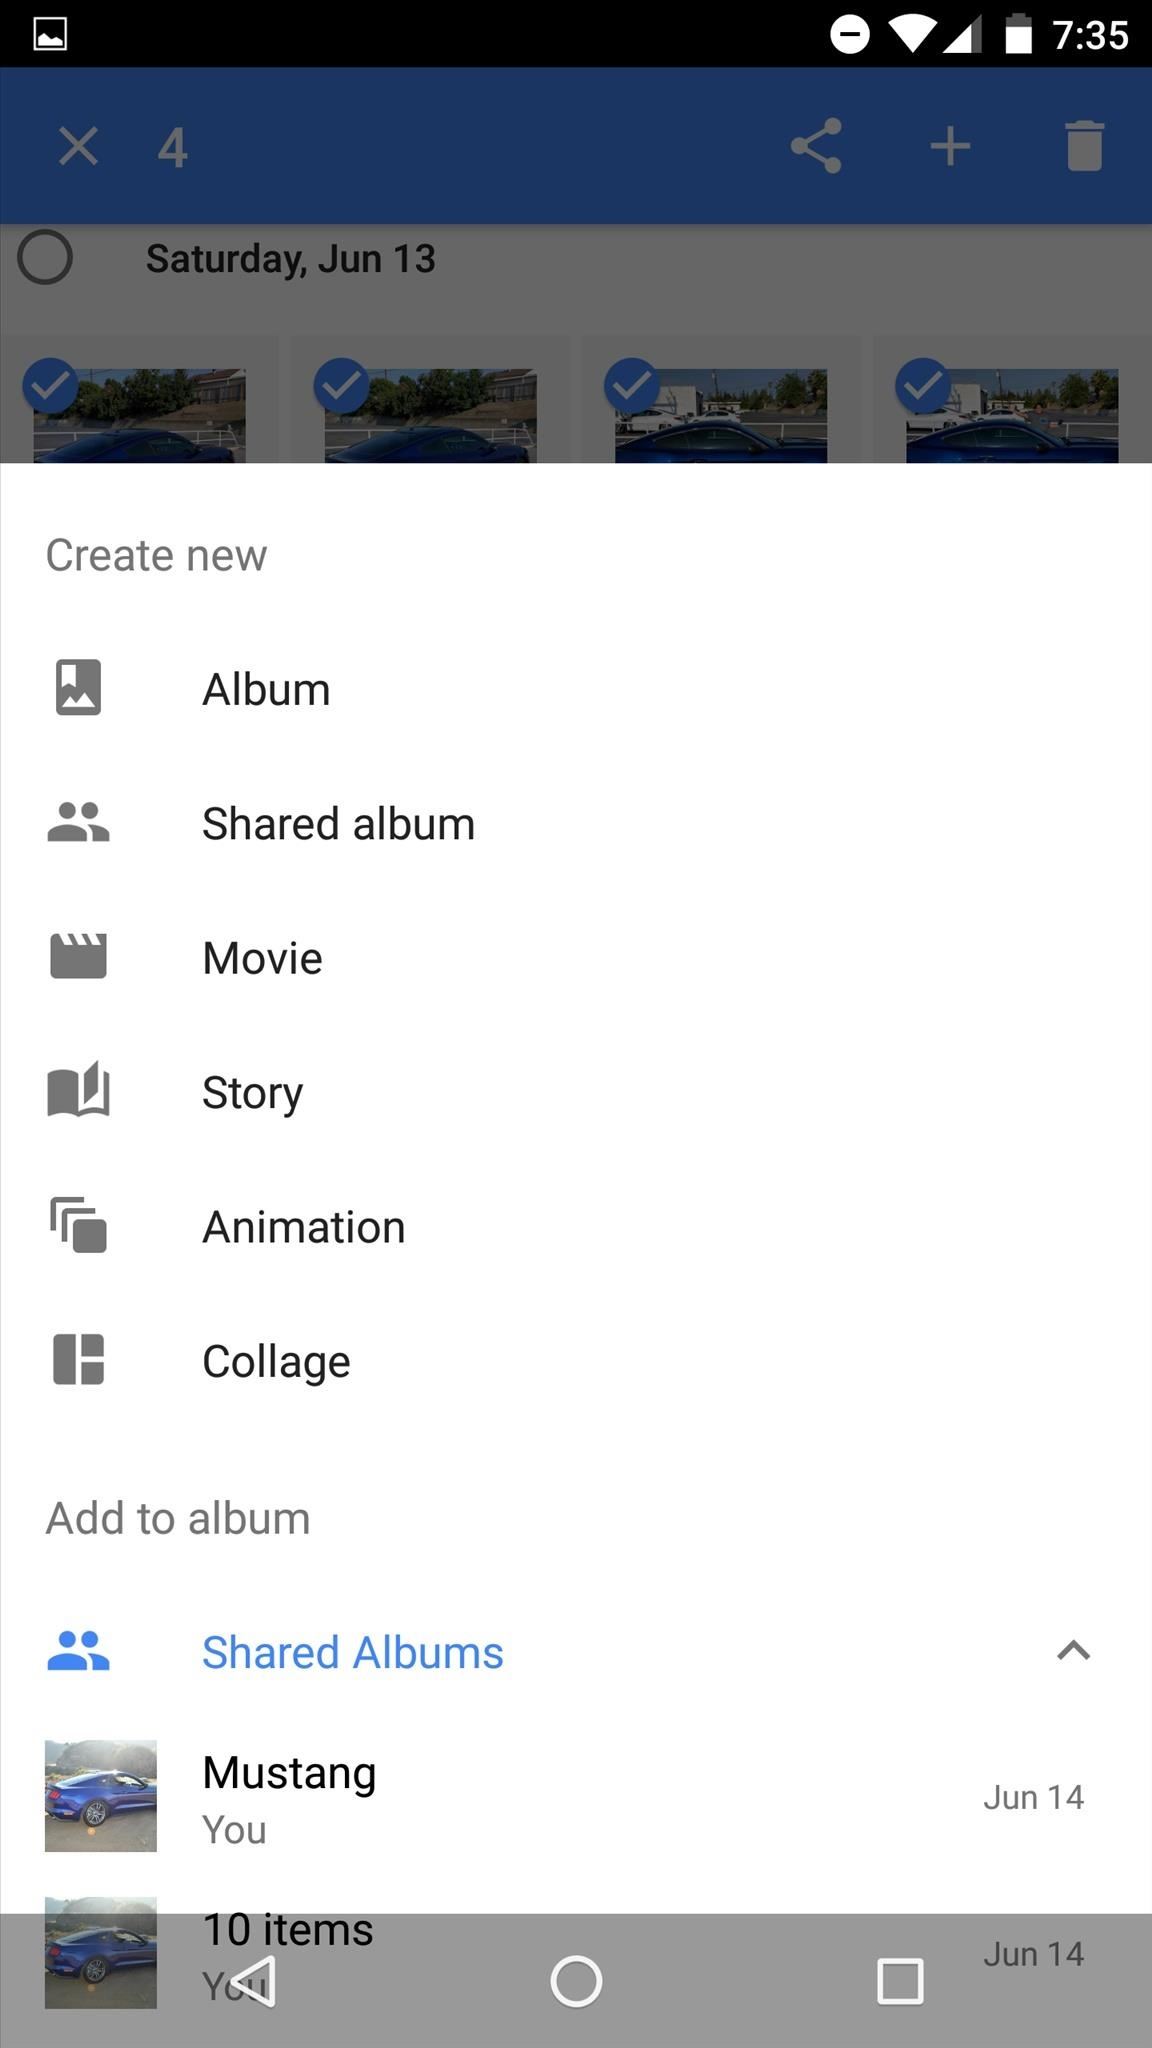
Creating a shared album on mobile is simple, and there are a few other ways to do it, but this is the easiest. Once inside the mobile application, select the "+" sign. This will bring up a menu that will give you the option of creating a shared album—select Shared album to get started.

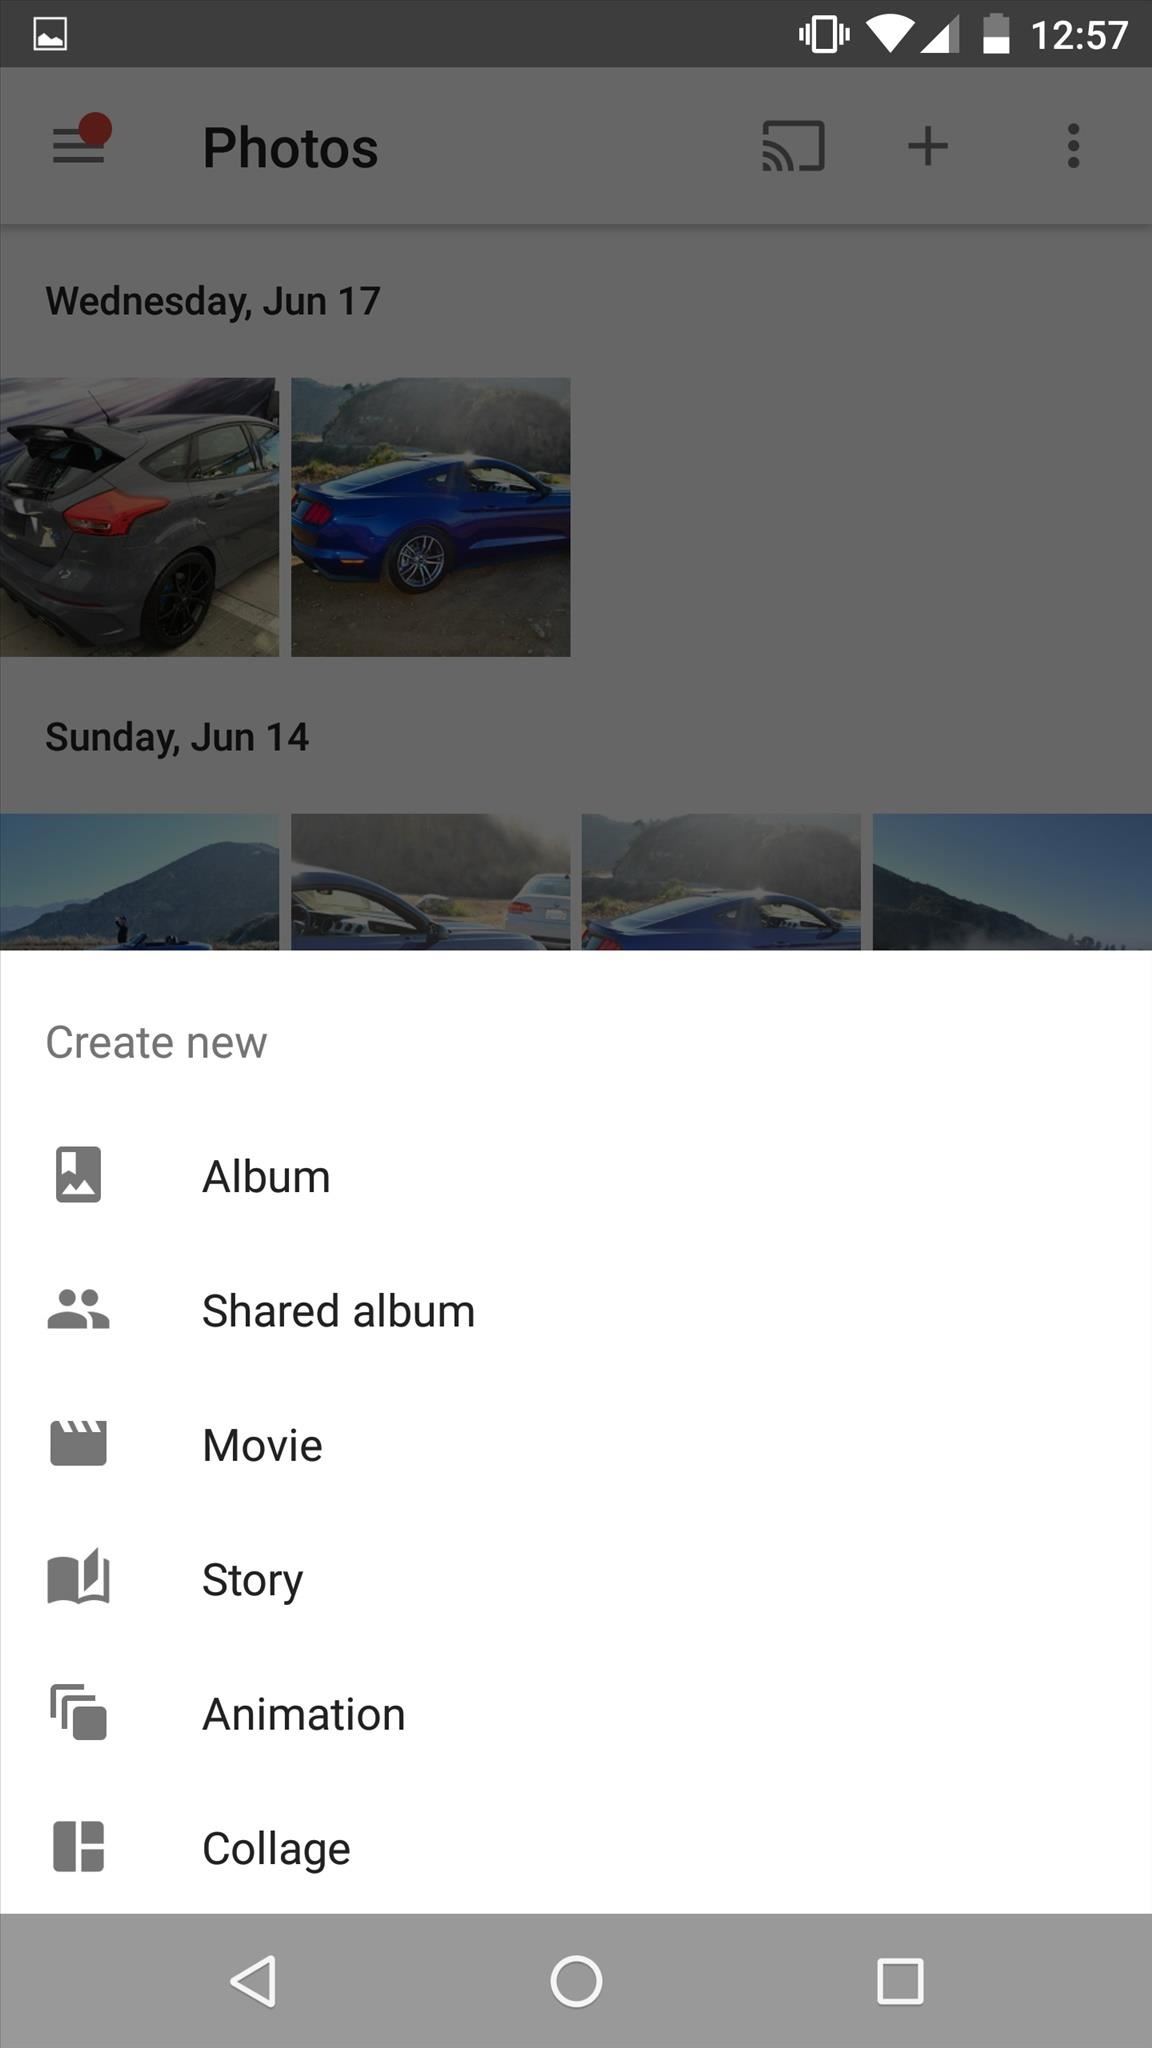
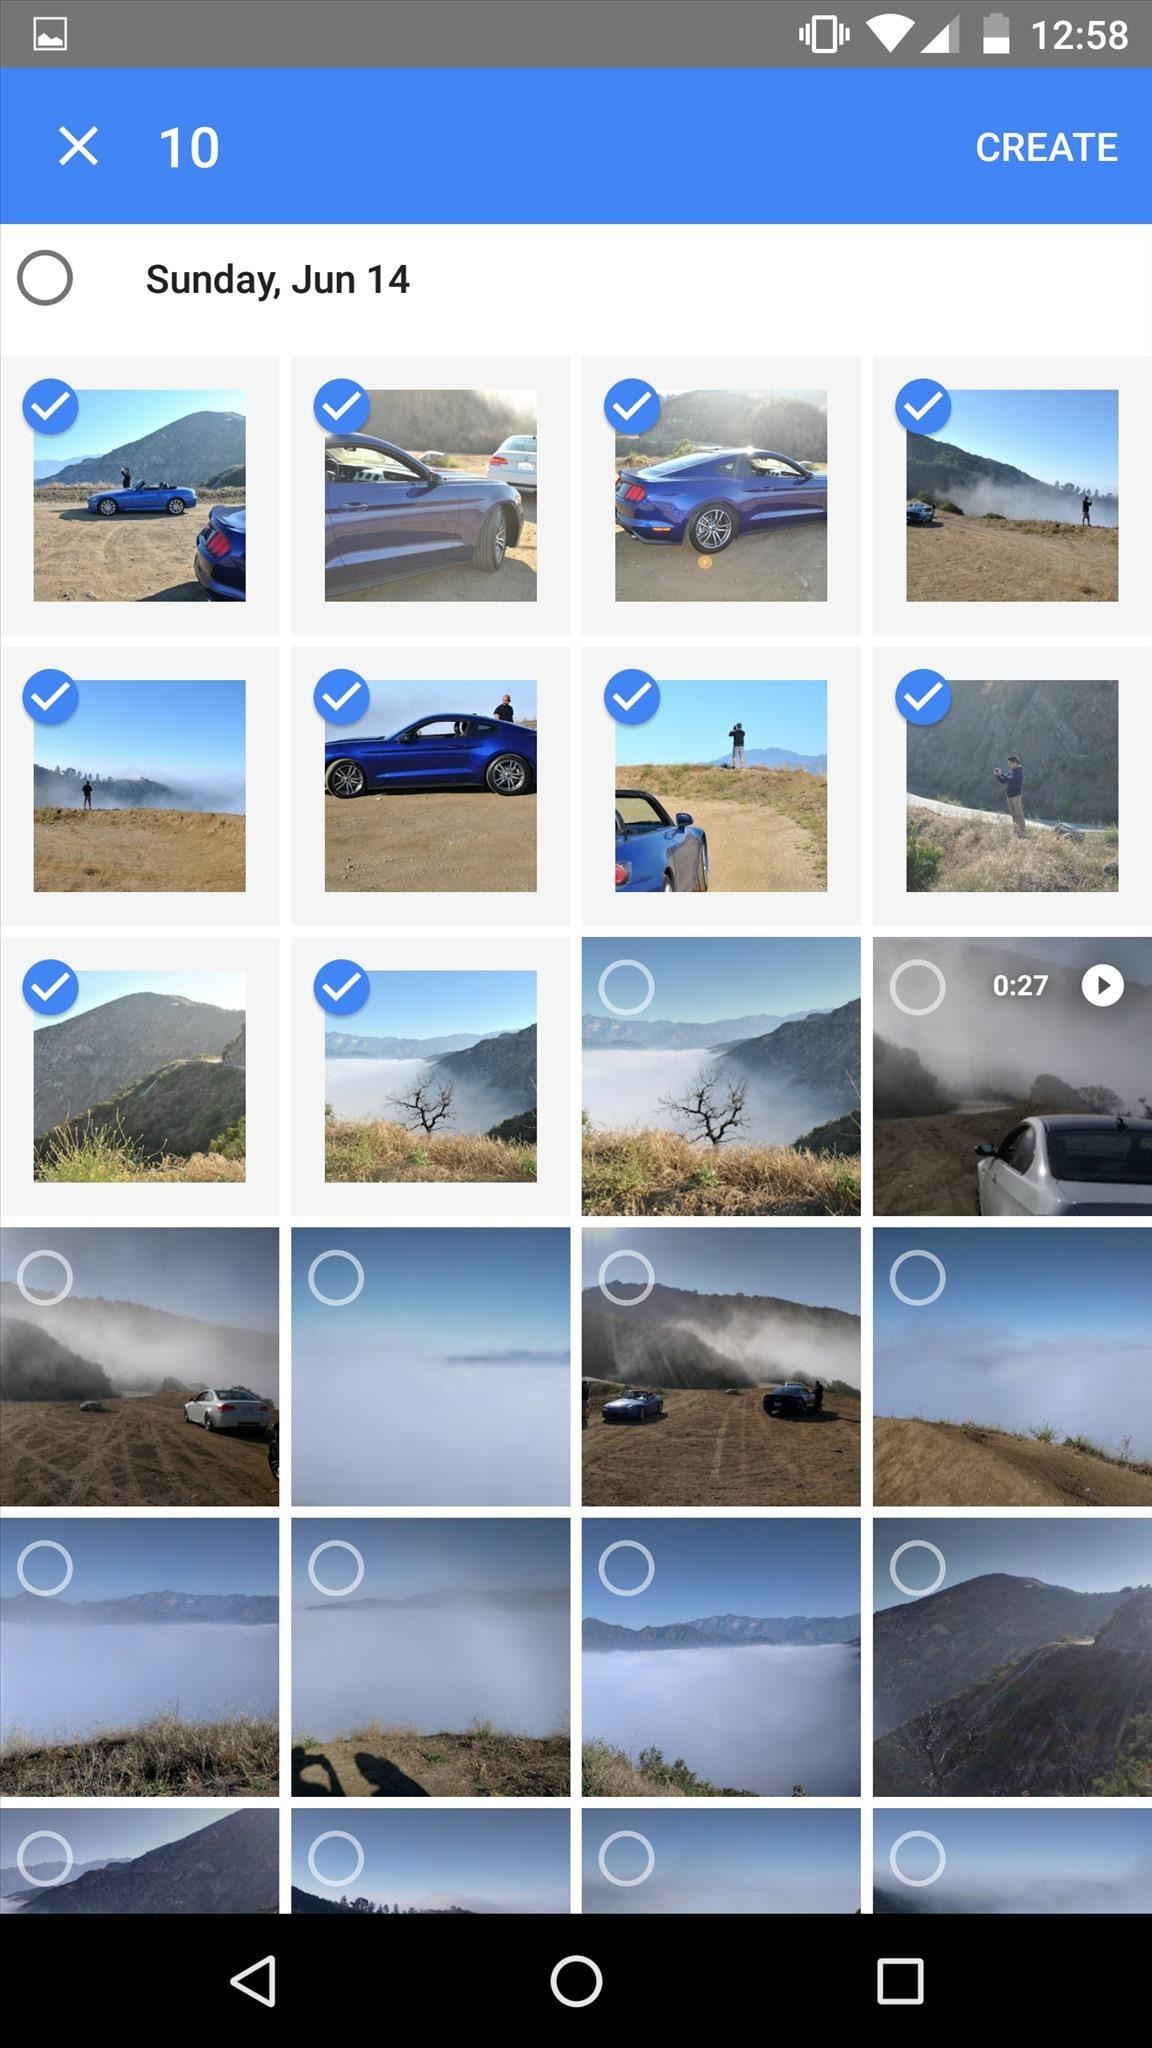
Once you select Shared album, Google Photos will prompt you to begin selecting photographs for your new album. Select as many as you wish, it's your album!
Once you're done selecting your photos, select Create at the top right of the screen. After this, name your album and then select Share on the top right of the screen.
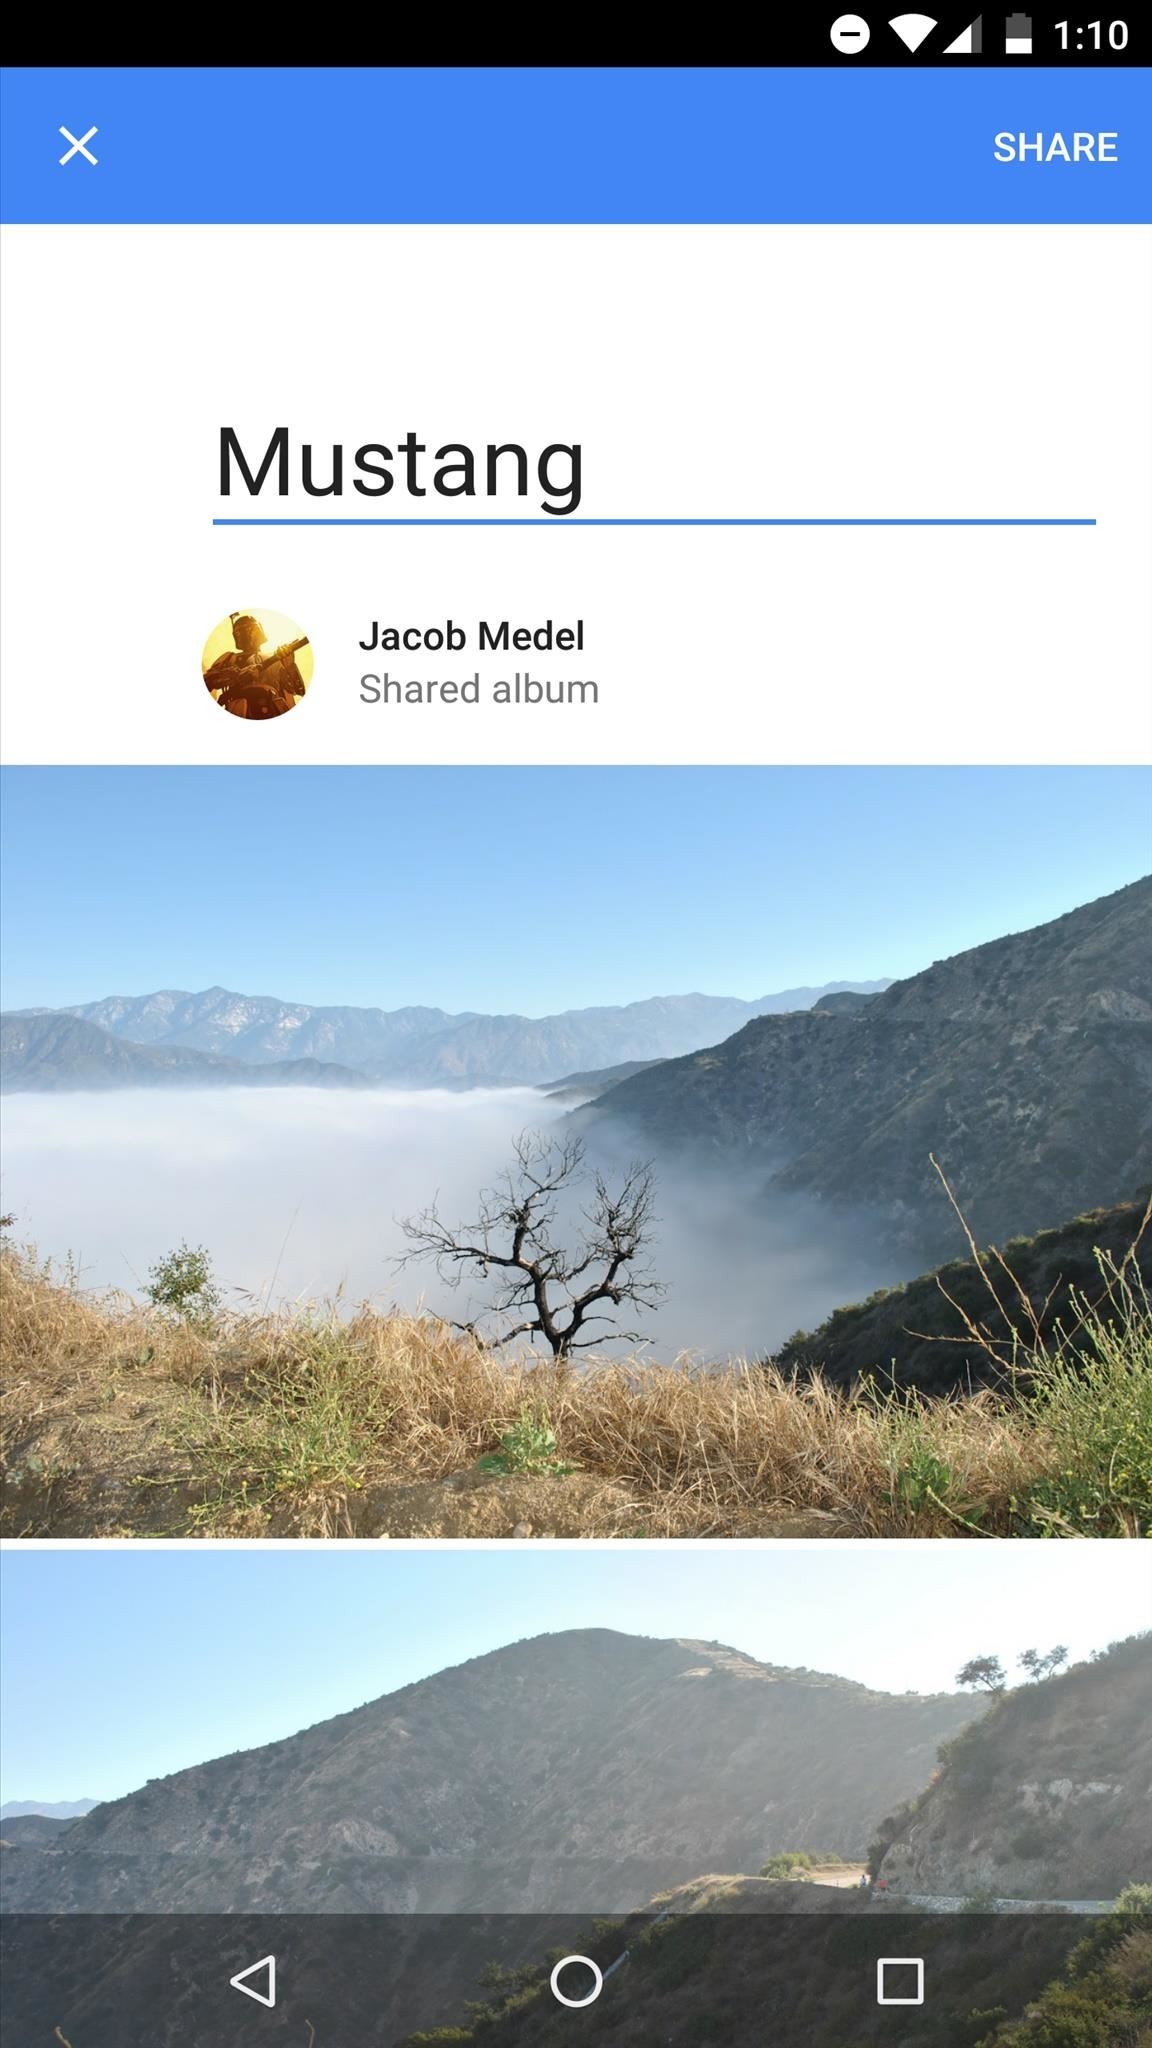
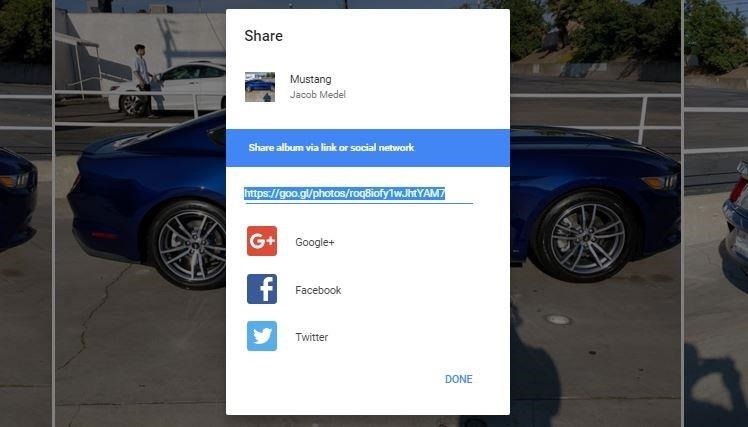
Google Photos will give you a link to the album that you can now share with whoever you wish. Make sure that "Let others add their photos" is selected, otherwise, the person you're sharing the album with will only be able to view photos, not add to them.
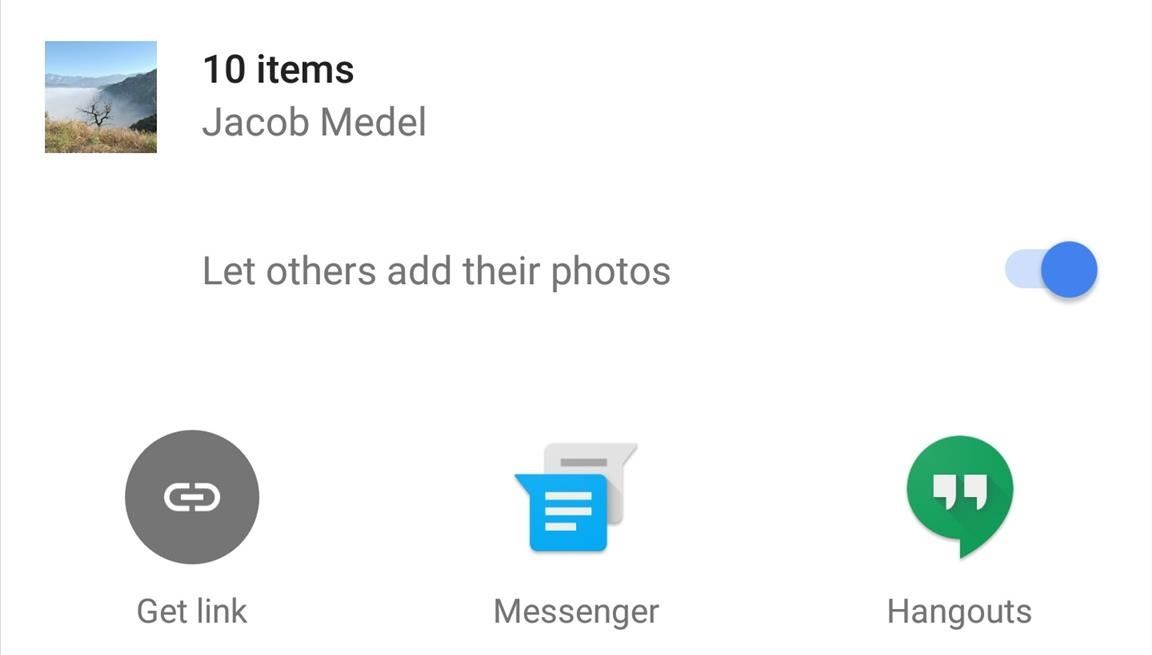
Once you've provided the link to your desired person, they'll now be able to add photos to the album whenever they wish. To keep adding photos to a shared album, simply select the photos you wish to add, then select the "+" symbol at the top right of the application. At the bottom will be your shared albums—find the shared album you wish to add pictures to and select it.
Creating a shared album on a desktop browser is very much the same process. First, you're going to need to visit Google Photos website.
At the top right of the screen, there will be the "+" symbol. Select it and click shared album. Google Photos will now prompt you to select your photos.
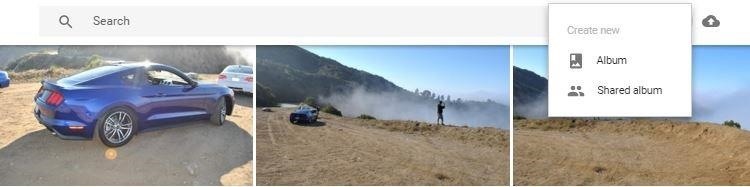
Just like last time, Google Photos will prompt you to select your photos, create your album, name it, and then give you a link to share.
Step 3: Show People Your Albums!
As you add photos to your shared album, you're probably going to want to show off your album to other people you didn't share it with already... you know, like your mother. To do this, access the slide-out menu on the left, go to shared albums, find the album you wish to share, select the three vertical dots, and select copy link.
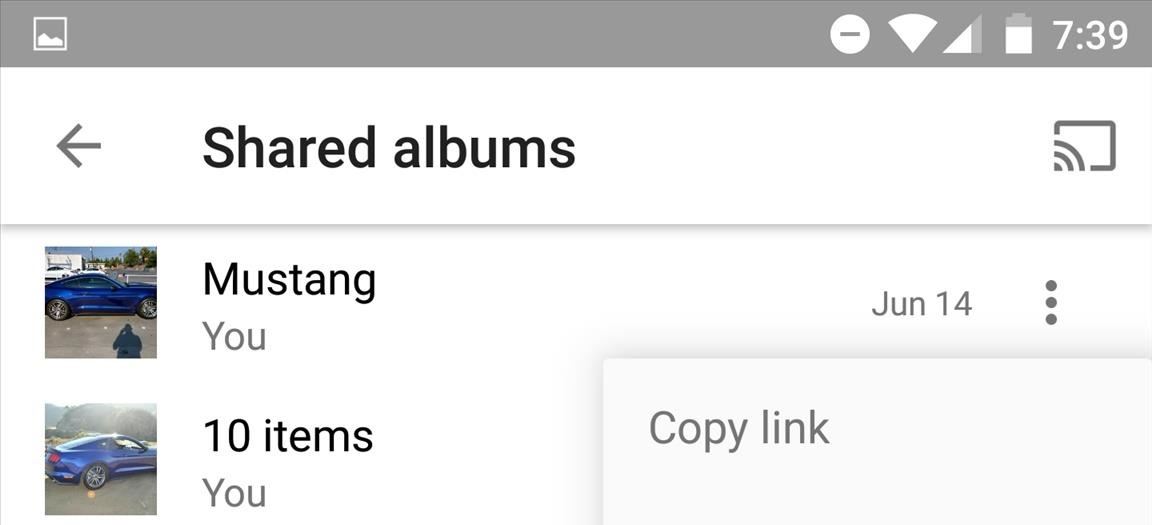
This will give you a link that you can send to whoever wants to follow your album. If you only want the person to view the album, make sure to uncheck "Let others add their photos."
On a desktop browser, the process is nearly identical. Simply access the menu on the left, select Shared albums, choose your album you wish to share, click the share button (three dots with interconnecting lines), and Google Photos will then provide you with a link.
Make sure to follow Gadget Hacks on Facebook, Google+, or Twitter!
Just updated your iPhone? You'll find new emoji, enhanced security, podcast transcripts, Apple Cash virtual numbers, and other useful features. There are even new additions hidden within Safari. Find out what's new and changed on your iPhone with the iOS 17.4 update.


Be the First to Comment
Share Your Thoughts