

As we go about our daily grind, our smartphones and tablets take a silent beating. Dirt, dust, oil, and grime that our hands have picked up immediately gets transferred over to our shiny pocket-sized computers every time we check the time or look for new notifications, and over the course of months, this can have a very noticeable adverse effect.
- Don't Miss: The Best Practices for Cleaning Your Smartphone
Somehow, second-hand gunk and pocket lint always seems to find its way into the crevices around any physical buttons on these devices, which in turn leads to a "stuck" button that loses its firm click and becomes physically hard to press. This type of stuck button isn't mechanically broken, so there's no need to replace parts. A simple cleaning should do the trick, and I'll show you the most effective method I've found below.
Materials Needed
- isopropyl alcohol
- Q-tips (or any cotton swabs)
- canned air duster
Step 1: Clean Around the Sides of the Button
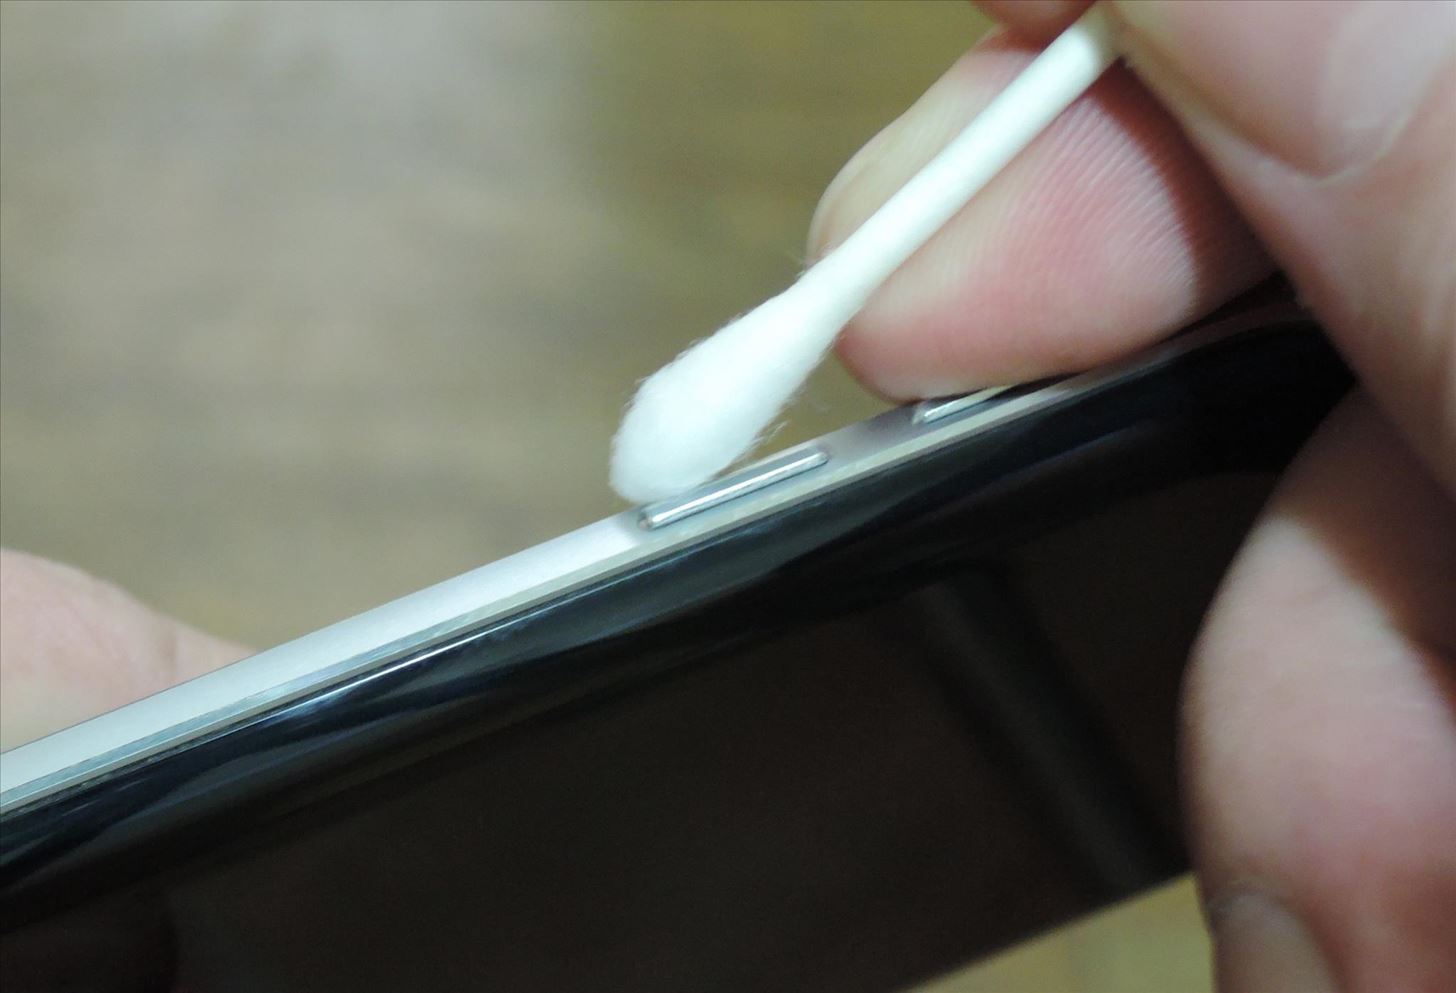
First up, turn your device off and remove the battery if possible just to be on the safe side. Next, dip your Q-tip into some high-percentage isopropyl alcohol. You want to fully saturate the Q-tip, but you don't want it to be dripping wet, so shake off any excess alcohol.
From here, use the Q-tip to clean the sides of the stuck button on any surface that sticks out from your phone, working the cotton fibers as far down into the cracks as possible. To be on the safe side, I'd recommend that you turn your phone upside-down while you work so that gravity will prevent any alcohol from seeping into your device.
After you've thoroughly cleaned any parts of the stuck button that you can access, give the button a few clicks to help free up any grime that has accumulated.
Step 2: Clean the Frame
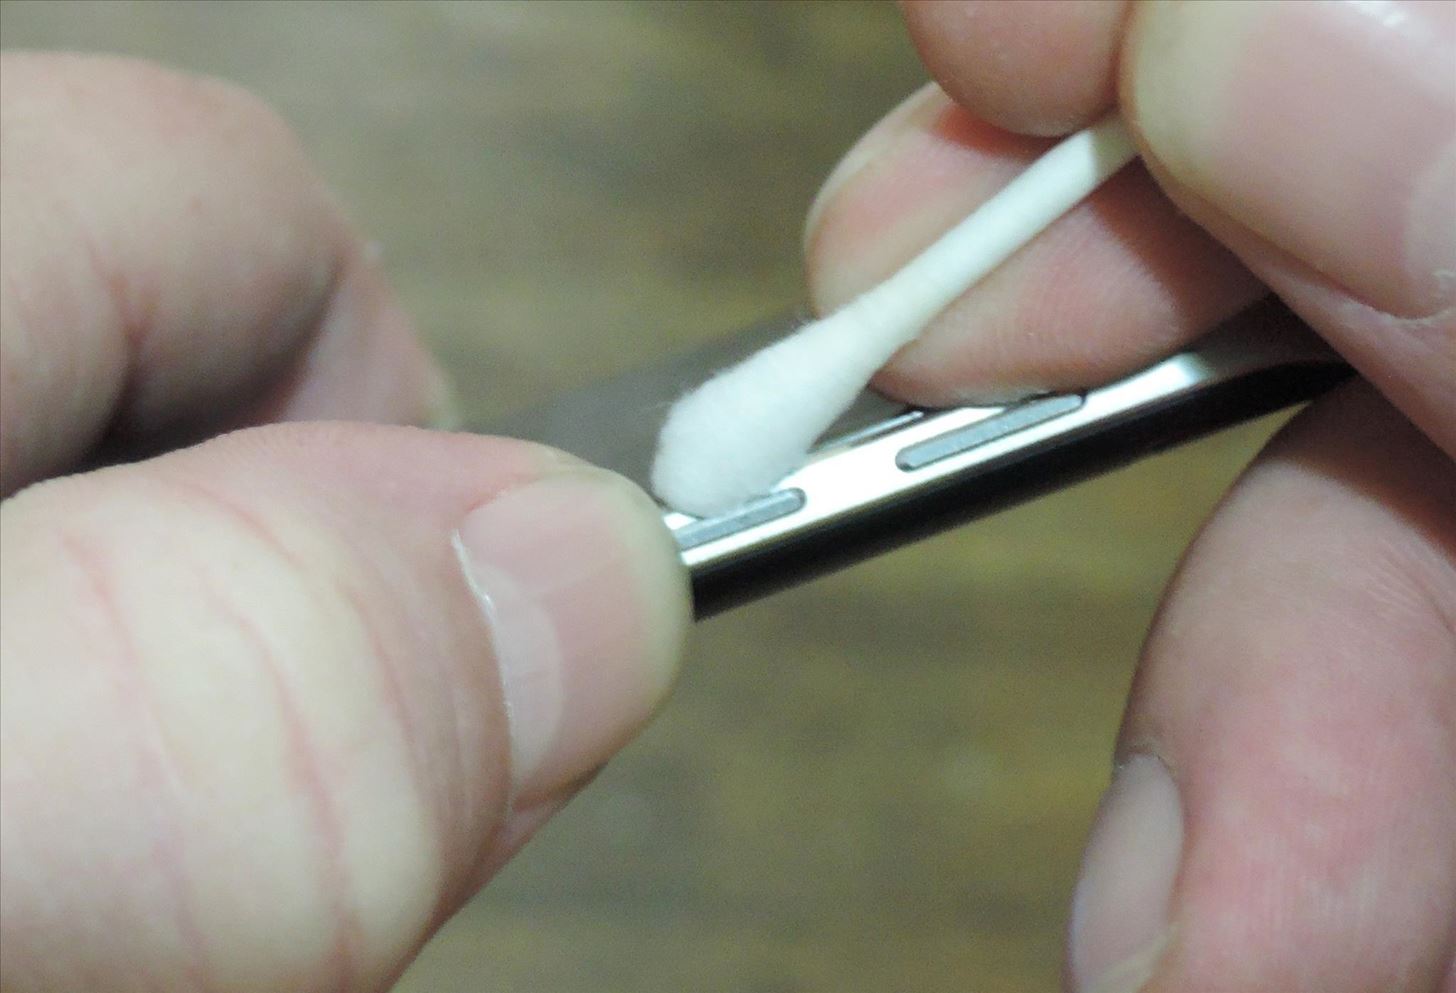
Now that the button itself is relatively clean, you'll want to clean the part of your gadget that the button protrudes from. This is kind of tricky since the button usually fills this gap entirely, but if you press down on the stuck button, your Q-tip should be able to clean this area more effectively.
So hold one side of the button down firmly, then use your alcohol Q-tip to clean the inside of the frame of the device where your button is housed. When you're done, hold down the opposite side of the button, then clean the area that your finger was previously blocking.
Step 3: Blow Debris Away with Canned Air
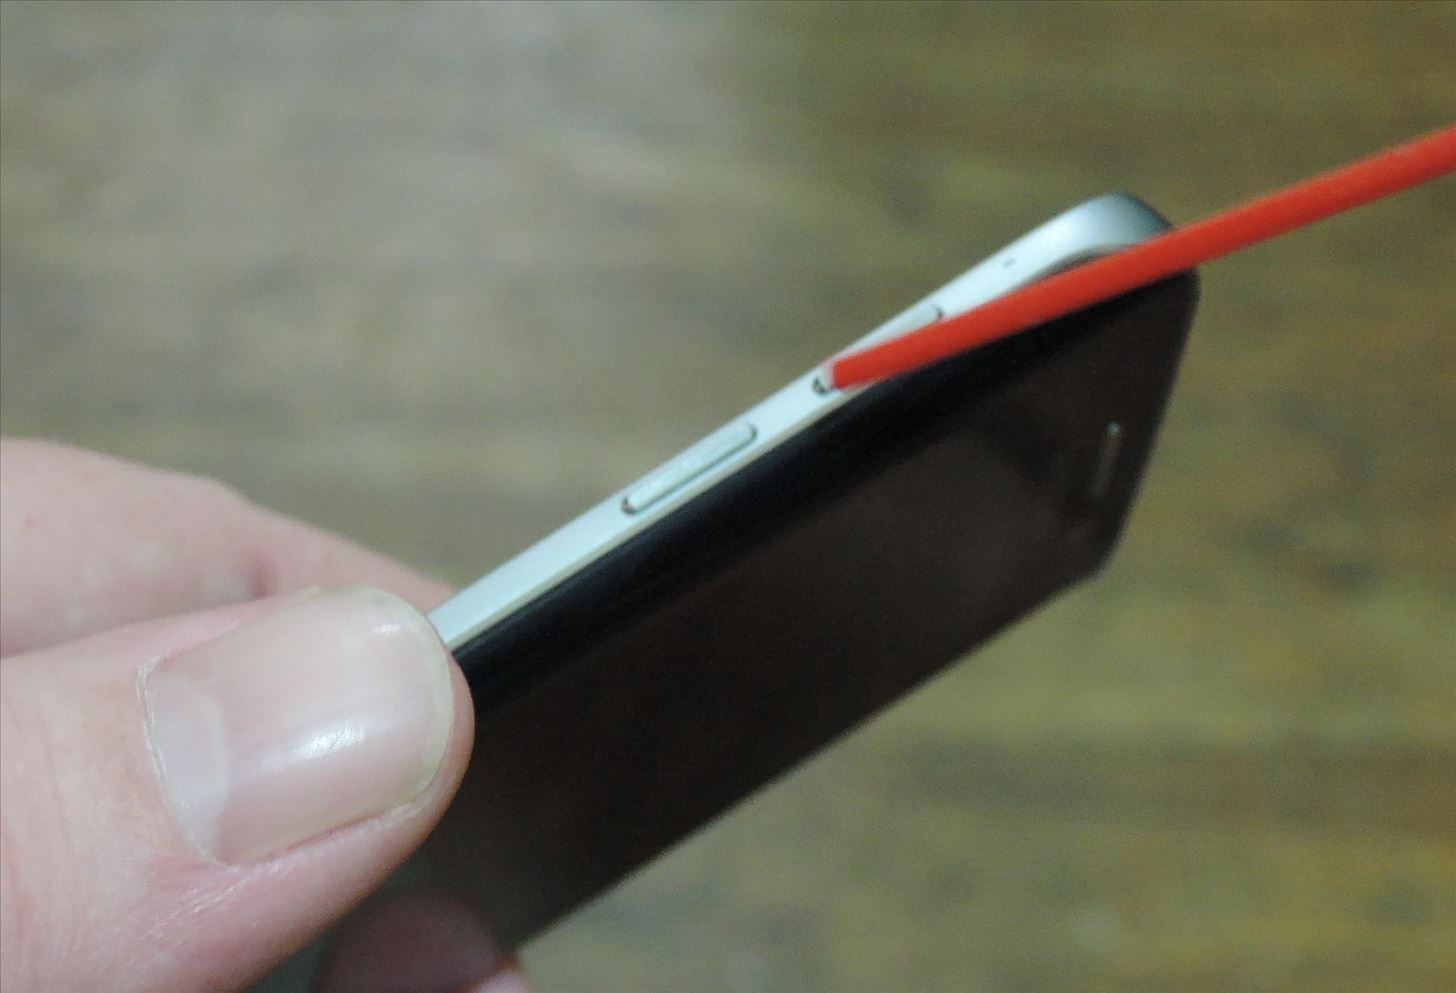
After cleaning the button and surrounding frame, grab some canned air and put the nozzle parallel to the stuck button. From here, give it a few quick bursts of air to help free up any remaining debris, but be careful not to blow any dirt or grime down into the device.
At this point, your stuck button should already be a lot more "clicky" and easy to use, but you may have to repeat these steps a time or two to clean out all of the dirt and grime. Eventually, though, that stubborn sticky button should finally behave like it should.
Did this method fix your stuck smartphone or tablet button? Do you have any other tips we should try? Let us know in the comment section below, or drop us a line on Android Hacks' Facebook or Twitter, or Gadget Hacks' Facebook, Google+, or Twitter.
Just updated your iPhone? You'll find new emoji, enhanced security, podcast transcripts, Apple Cash virtual numbers, and other useful features. There are even new additions hidden within Safari. Find out what's new and changed on your iPhone with the iOS 17.4 update.


2 Comments
But won't it turn on when I hold down the button to clean it? I have non-removable battery.
What if power Button is sunk?
Share Your Thoughts